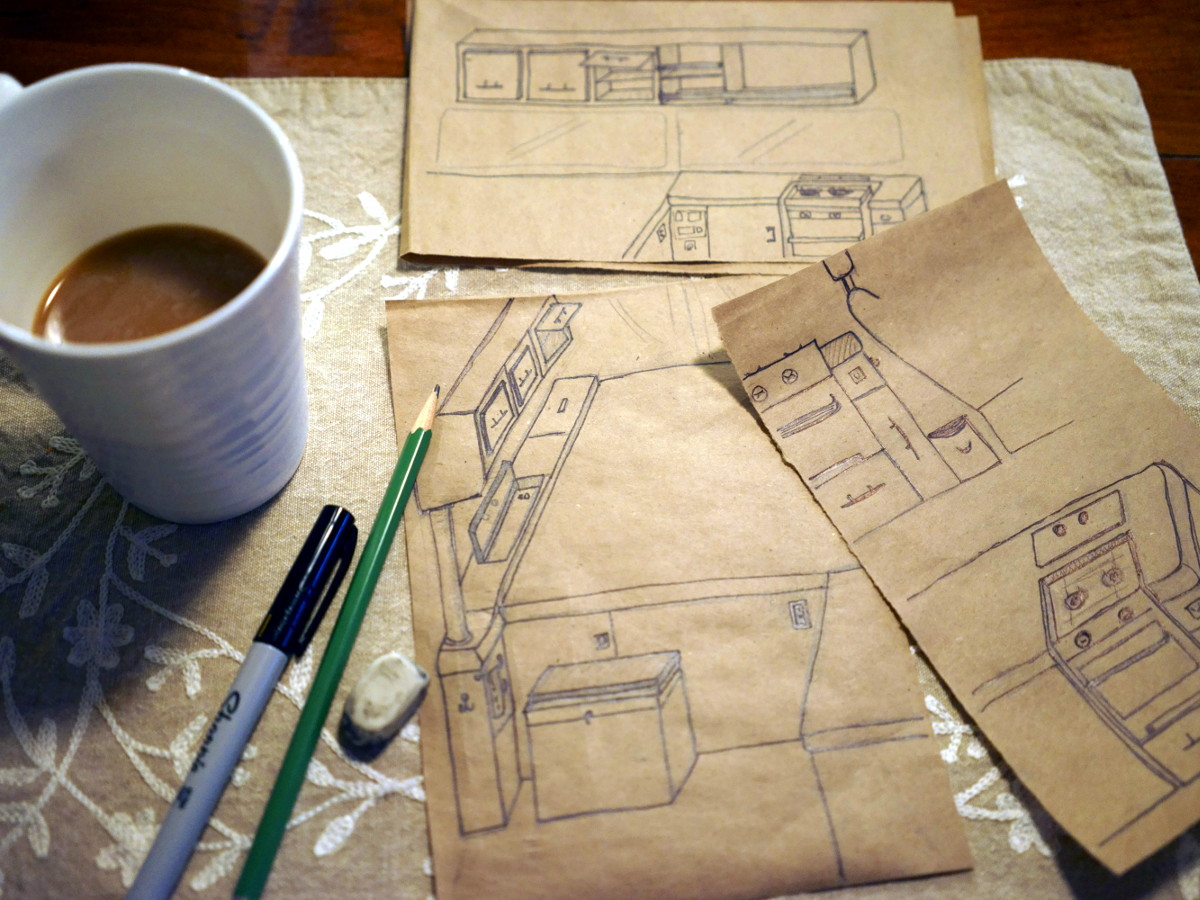
The layout and features of the van took a fair bit of thought and, there being two of us, some amount of discussion. We had the advantage our experience with our old van and the vast wealth of builds other people have displayed online. The features we wanted to carry over from the van - Betsy from here on - were:
- 4x4
- solar
- separate house battery bank
- walkable, full roof rack
- fridge
- inverter
- windows
Features we added to our list as upgrades on Betsy were:
- ventilation fan
- better storage
- better bed
- better insulation
- better kitchen
- better 12v + 120v distribution
- breakers, not fuses
- high ceiling
- better lighting
- shade awning
And, from dreams of abundant salmon in the Pacific Northwest:
- freezer
There was a lot of research put into some of these components and our thought process in the decision making is probably idiosyncratic, but for posterity here is an abridged list of final components. We would be happy to field questions or suggestions and add them to this page if anyone cares to get in touch.
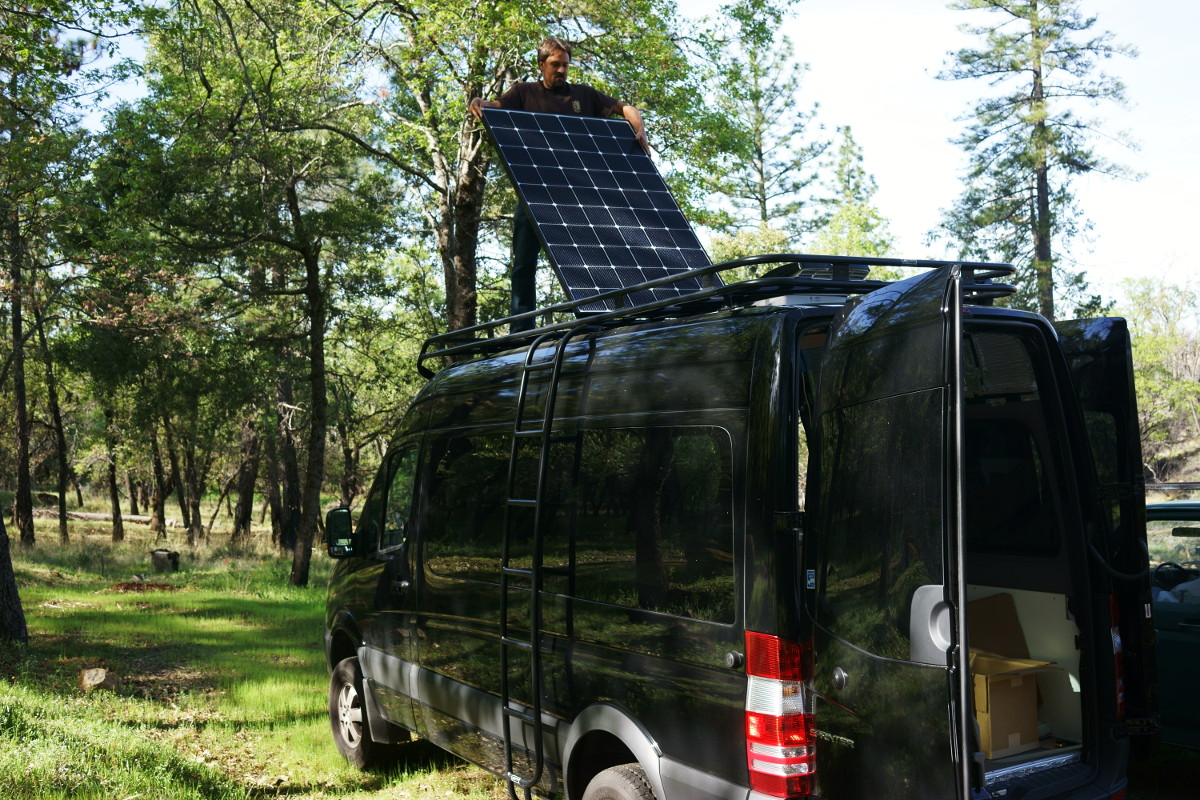
Solar:
345W, 72 cell LG panel, wired to house bank via a Victron Energy 100/30 Smart MPPT charge controller.
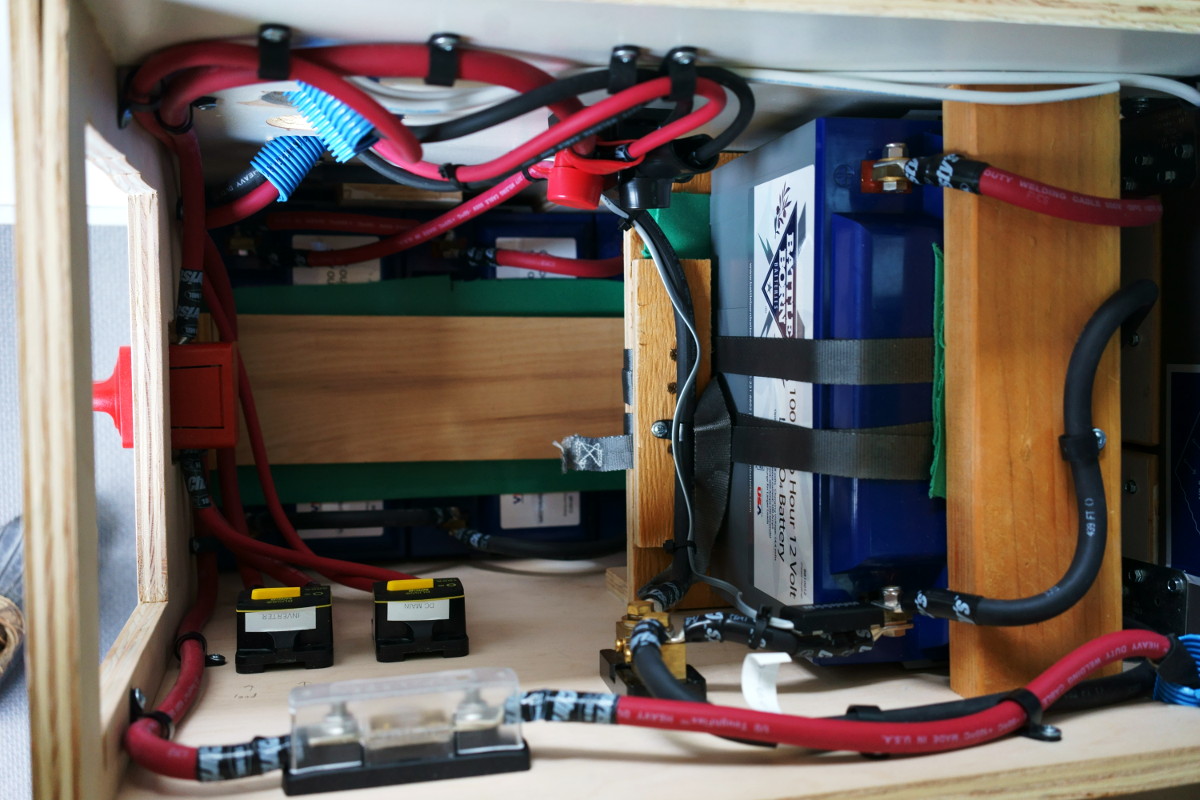
Battery:
Factory aux bank @100 AH lead acid and house bank @400 AH lifepo4 w/ marine battery selector switch. The house bank is comprised of 4 battle born 100 AH batteries wired in parallel. Weight and depth of discharge were the primary concerns when selecting the house batteries. All systems are 12v nominal. Shore power and solar inputs are isolated to the house bank while the alternator is isolated to the aux bank. Unless you bridge them with the battery selector switch… I should get a lock-out for that.
Rack:
Aluminess rack. Our old rack was homemade and a tank. It also weighed a ton and turned Betsy orange with rust over time.
Fridge:
Isotherm CR 130 drink 12v/120v. Betsy had a 120v fridge that required the inverter to be on all the time. This actually worked perfect, but we were designing an upgrade so I went with a 12v compressor to reduce power draw and wear on the inverter. And then we added a shore power inlet, so I opted for the ability to run the fridge from 12v or 120v power. The drink version just means that the combination freezer has been removed and the whole space is dedicated fridge. The unit draws about 2 amps, according to the manual.
Inverter:
We started with a Magnum ME2012. I wanted shore power, a battery charger, and a transfer relay in a single unit. This Magnum unit checked all the boxes and was ostensibly a serious work horse. I was slightly concerned about charging batteries on the road with the modified sine output, but almost everything we had was 12v anyway… In the end we installed the Magnum and had to take it back out. The transformer hum from the unit was 55 db @ 2 ft and I couldn’t imagine being in the van while the thing was on. We traded out for a Xantrex Freedom XC 2000 which cost half as much, operated completely silently, and supplied true sinewave output. It also weighed 40 pounds less.
Ventilation:
We settled on a MaxxAir reversible, thermostatically controlled fan.
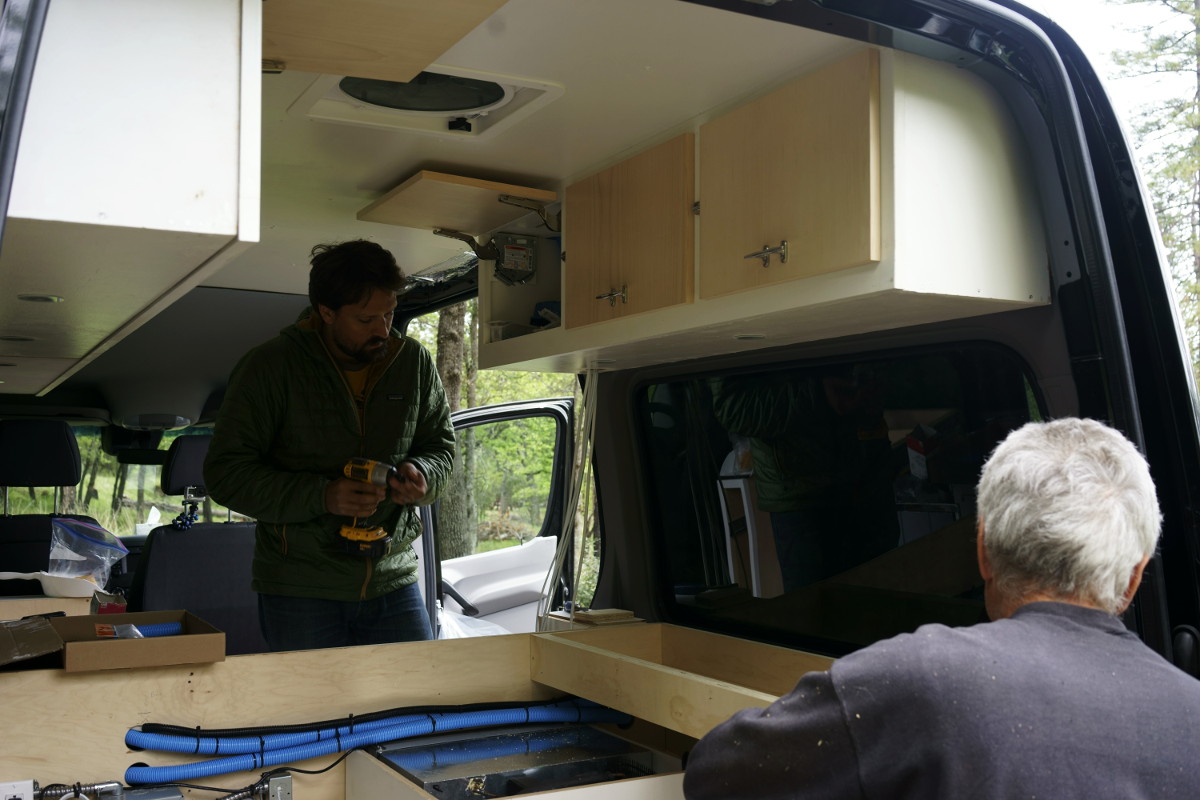
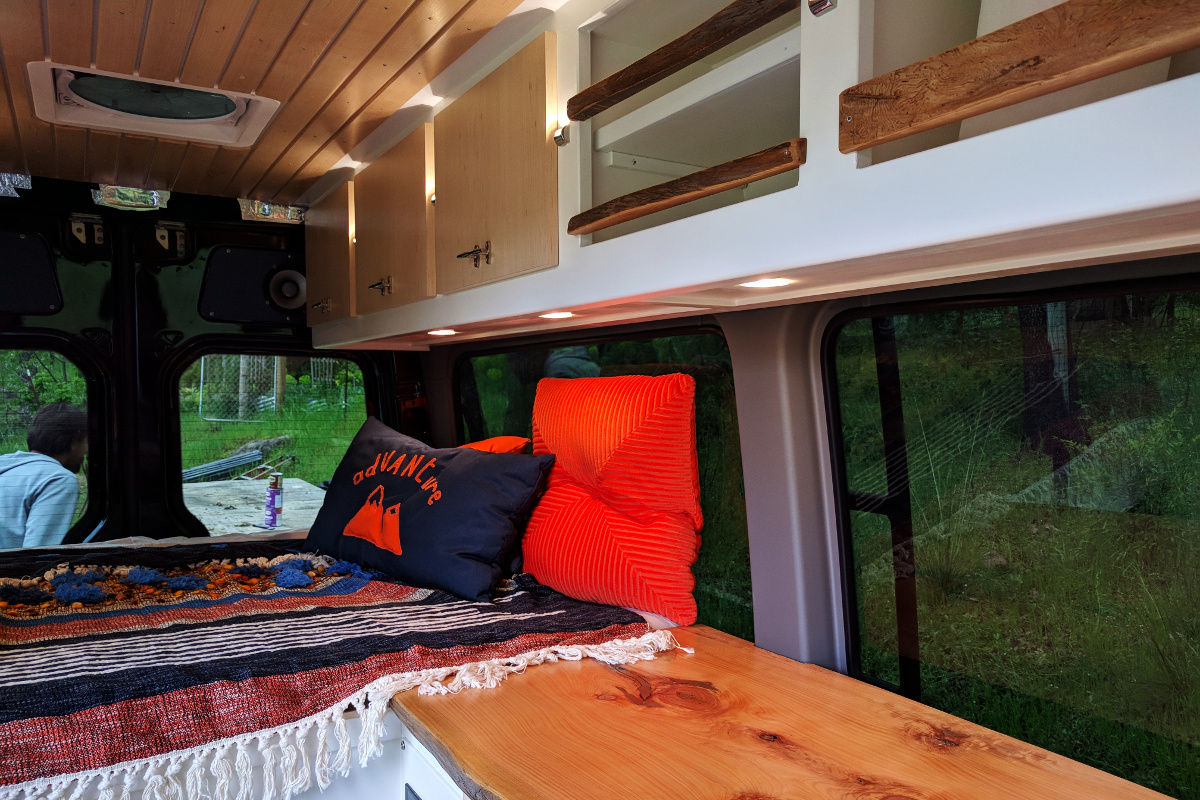
Storage:
Betsy was not a tall model so she had no overhead storage. The Sprintilus has storage overhead on both sidewalls and additional storage under the bed, in the kitchen stools, and in the kitchen area cabinets. We also fitted a bedside table with his and hers’ top lifting storage for small electronics, like phones and laptops. This bedside table is wired with 12v and 120v outlets so that we can charge everything while it is stored. The only equipment to note here are the overhead cabinet hinges which are made by Blum and hold the doors open against the ceiling or closed when full, preventing spillage.
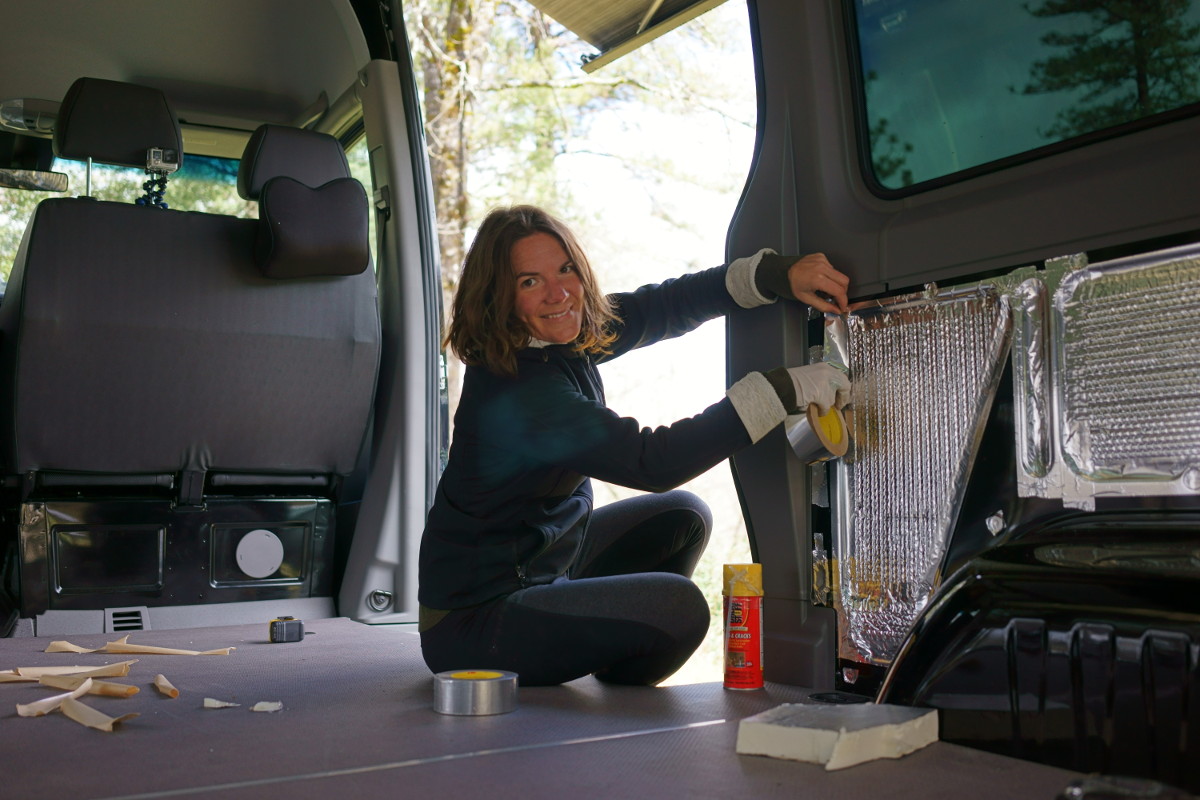
Insulation:
We filled every wall and ceiling cavity in the van with 2” poly iso foam insulation board and pink fiberglass badding. The floor got a 1” board of non-compressible foam insulation. Everything was sealed from the interior with Reflektix and metallic ducting tape. Celine also sewed double layers of Reflektix into all of our window coverings.
Kitchen:
We installed a Dickinson marine propane oven/stove. We had the three burner model at home and loved it, so the two burner model seemed like a natural fit. It is fed by a Trident marine LPG locker with remote solenoid under the bed which is vented to the outside. There is also a CO/propane detector. Betsy had a travel Coleman stove…
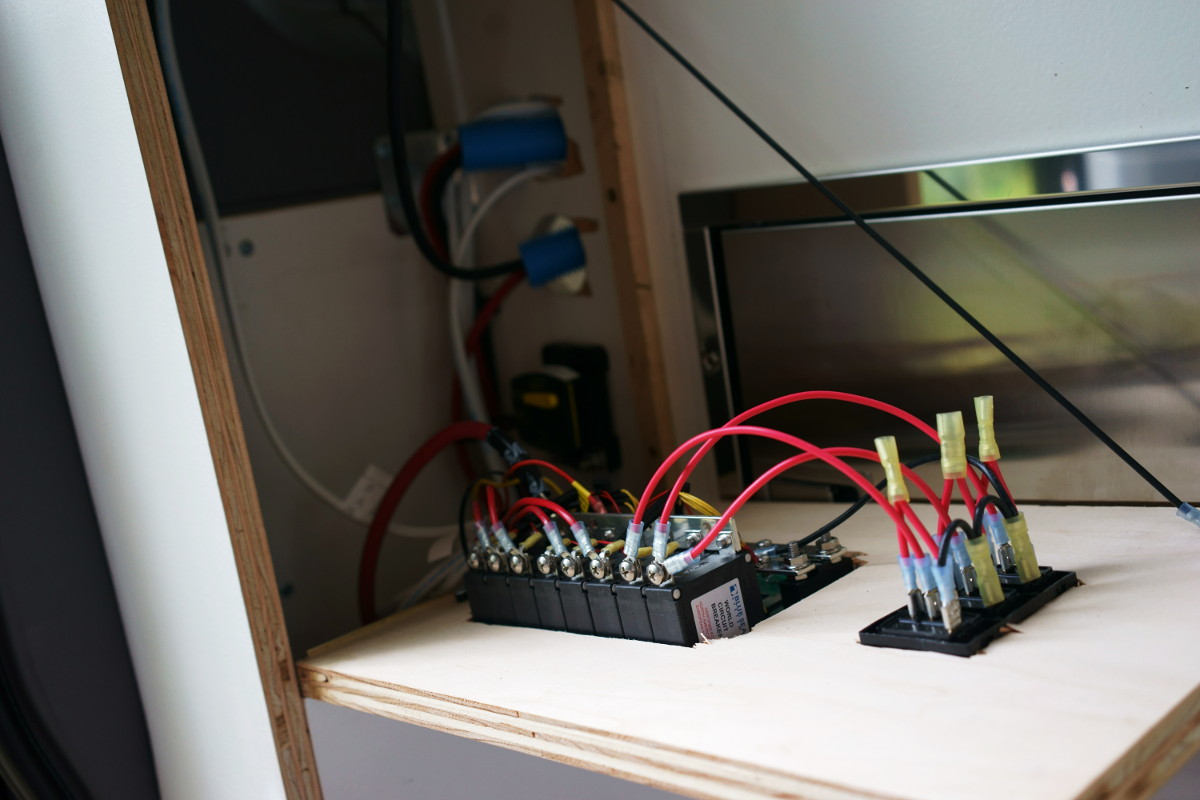
Electrical distribution:
We used Blue Sea Systems main panels for both the 12v and 120v systems. The 12v panel has 8 positions and the 120v panel has 3. The main panels, the inverter, and the solar charger are all wired through Blue Sea Systems breakers. I almost accomplished my goal of avoiding fuses, but the remote solenoid circuit required a 1 amp in-line fuse. I also fused the main feed from the aux bank because I never intend to use it and a seller on Amazon sent me the wrong thing. I didn’t have time to replace it with the correct breaker.
Additionally, the wiring was done entirely with marine-grade Ancor stranded wire and crimp connectors.
Lighting:
We installed six downward facing lights in the bottoms of the overhead cabinets which draw about 3 amps and are dimmable, eight upward facing lights in the face frames of the same cabinets which draw about 0.4 amps, and finally mounted dimmable exterior lights on the rack for the area under the awning. All of these lights are 12v marine LED products made by Lumitec. Each group is switched individually on a Blue Sea Systems rocker switch and the exterior lights are selectable white/red. We were careful to source all of our LED lights from the same supplier in order to match the output color.
Awning:
We mounted a Fiamma F45S 10ft awning directly onto our rack.
Freezer:
We didn’t have enough space to fit a freezer the same size as the fridge, so we installed an Isotherm CR 65 12v/120v freezer which was slightly less tall than the fridge and fit underneath the bed. This unit matches the fridge in its ability to function on either input voltage. It draws about 2 amps, according to the manual.